Tuesday, July 21, 2009

The Living Room is back from the dead!

this weekend my soulmate came back from harrisburg to help me reinvent my living room.
this is what happened:

(paint colors- "harvest brown", "adriatic mist", and "off-white", all by behr.)

Photobucket

Photobucket

Photobucket

Photobucket

Photobucket

Photobucket

Photobucket

Photobucket
currently in search of the perfect sofa cover. until then, this is the one that came on the couch when we got it off craigslist. not sure what colors we should be looking at. ideas??

Photobucket

Photobucket

Photobucket

Photobucket

next:
Photobucket
we'll be painting the ceiling "adriatic mist" like the top part of the wall, and the center piece off white, like the trim, to give the whole room a domed-ceiling feel. i think it'll be beautiful.


and as soon as our bank accounts have time to recover, we'll be tackling the "dining" room. right now it is glorified storage (at least it's organized!) but it needs to be painted and spruced up a bit.

Monday, July 13, 2009

domestikatie's kitchen cleans up well.

i re-did my entire kitchen!
i cleaned and organized and decluttered and totally overhauled everything.
i even painted. and finished the whole dang thing.

wanna see?
come on in!

Photobucket
the front door. and my aprons. the paint color is called "river's edge" by behr, with off-white trim.

Photobucket

Photobucket

Photobucket
lucy the cat likes to eat breakfast by the window. also, i bought way more flowers for the fire escape. and this morning, i sat out there and drank my coffee. and i loved it.

Photobucket
this was before the fellas installed MY NEW COUNTERTOP!

Photobucket
AND AFTER! omg.

Photobucket
so cute.

Photobucket
and sooo much more space!


and in case you've never seen my kitchen before this:
Photobucket

Photobucket
(those were taken before we had really "moved in", aka filled every surface with an unimaginable amount of clutter.)

i have more artwork to hang, and i'll post more pics as i go.

but there you have it- my new favorite room in the house.

next: my living room! (this weekend!!)

Tuesday, June 30, 2009

My Favorite Chocolate Chip Cookie Recipe EVER.

I have never in my life tasted chocolate chip cookies quite like these.

I have a preference for the big, fat, thick, chewy, melty kind of cookie.
Any recipe I had tried before this produced chewy cookies right out of the oven, but soon hardened, and these stay chewy even if just left on the counter.

Photobucket

I found this recipe in a cookbook my mom got us for Christmas so aptly named "The NEW Best Recipe- by the Editors of Cook's Illustrated". It's an amazing cookbook that teaches you how to make just about everything, and also explains what each ingredient brings to the recipe. It's so crazy great.

Anyway, this is my go-to for whenever that hankering for childhood strikes.
Enjoy!

Ingredients:
2 cups + 2 tbsp unbleached all-purpose flour
1/2 tsp baking soda
1/2 tsp salt
1.5 sticks unsalted butter, melted and then cooled until just warm (VERY IMPORTANT! this is what keeps them chewy!
1 cup packed light or dark brown sugar (i used light.)
1/2 cup granulated white sugar
1 egg + 1 yolk
2 tsp vanilla
1-1.5 cups chocolate chips (i always use the whole bag! yummm.)

Directions:
preheat oven to 325. grease a baking pan and set aside.
in a small bowl, whisk together the flour, baking soda, and salt.
in a medium bowl, mix together butter and sugars until well blended.
mix in egg, yolk, and vanilla until just blended.
using a mixer on low speed (or a spoon), mix in dry ingredients until just blended.
add in chocolate chips to taste. (tonight i used chocolate/peanut butter swirled chips! oh man.)
roll dough into 1/4 cup balls and place on cookie sheet.*
bake for 15-18 minutes (i never do more than 15 because i like the center to be slightly undercooked. shh!)
allow to cool a bit before removing with a spatula and setting on cooling racks until warm.

obviously, the next step is to consume them with an ice cold glass of milk, feet swinging with pleasure.

Photobucket


*a tip suggested by the cookbook for creating beautiful cookies: roll dough into a ball, then break in half and place two sides next to each other, jagged edges up. press together into a circular shape, leaving the tops rough.

Thursday, June 25, 2009

White Pizza with Salmon, Garlic, and Capers- Oh My!

This is the most amazing pizza I have ever eaten.
I cannot believe I made this.

Ready?

Ingredients:
1 pre-made pizza crust (I used Trader Joe's crust and LOVED IT.)
1 tbsp olive oil

1 cup whole milk
2 tbsp salted butter
2 tbsp all purpose flour
4 cloves garlic, minced (+2 cloves garlic, minced, for topping)
Italian seasoning, salt & pepper

1 pkg grated mozzarella
1/2 can salmon, de-boned and skinned
1 tbsp capers

Directions:
Preheat oven to temperature indicated in your crust directions.
Brush edges of crust with olive oil.

Warm milk in saucepan on stove
In another saucepan, melt butter.
Add flour to butter and stir slowly, cooking for 1-2 minutes.
Slowly add warm milk, whisking thoroughly until thickened.
Add garlic and seasoning, stir thoroughly.

Spread sauce onto the crust evenly out to olive oil.
Top with mozzarella cheese (we LOADED it on!).
Scatter salmon, remaining garlic, and capers evenly.

Place pizza directly in the stove and cook according to the directions on the package. (ours was 10-12 minutes).

ENJOY!

Photobucket

Photobucket

Photobucket

Tuesday, June 9, 2009

Picky Eaters, this one's for you!

okay, i think an apology is long overdue.

i don't know what happened to my work ethic, but it obviously went to a very dark place.


but, i have retrieved it.
so here we go.

***

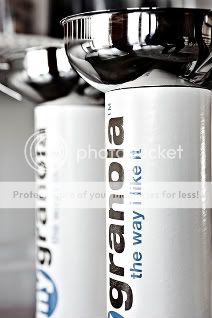
First and foremost, I owe an enormous apology to the wonderful company MixMyGranola.
Because they sent me a sample, and I inhaled it.
And I loved it.

And then I never blogged about it, as I had dropped of the face of the blog-world.

So, I want to take this opportunity to thank them for their generosity, and beg their forgiveness, as well as sing their praises from my internet rooftop, because this concept is sheer genius.
Photobucket

I don't know how many of you are picky eaters, like myself. But I have spent far too much time in life picking out the "weird" things from granola mixes, or trying to "just eat the m&ms". Foolish, I know. But whatever, I like my granola the way I like it.

Well, on this website- which is so appropriately named MixMyGranola-
you can pick and choose your base and mix-ins to effectively create your Perfect Granola.
Whether you're a health nut or a sweet-fiend, they have options you will love.

So here is what you do-

*You click on the link above, or go to www.mixmygranola.com.
*Then you choose from 4 base mixes.
I chose french vanilla.
*Then you choose your ingredients from 4 categories- fruits, nuts/seeds, extras, and enhancers (new!), each with a wide variety to choose from.
I chose dried raspberries
organic banana chips
dried sweetened cranberries
roasted almonds
flax seed
hazelnuts
chocolate mini morsels
oat bran flakes
and honey smacks!
because I fall more into the sweet-fiend category than the health nut one, haha.

*And finally, you name your one-of-a-kind mixture and submit the order.
Mine is dubbed "Happily Ever After" because it was sweet enough for dessert- the perfect ending to my day!

My 16oz. canister of fresh, sweet, crunchy, DELICIOUS granola arrived at my doorstep just two days later, and shipping was free!
Photobucket

Husbear and I polished off the entire 16 oz in record time. Oops. But let me tell you, it was something to behold. The ingredients were fresh and not stale, and every bite was as good as the last. It was amazing in milk like cereal, over yogurt, or by the handful!

So do these amazing geniuses a favor and head over to the website to get your paws on your very own creation! YUM!!

Tuesday, March 24, 2009

The Food Questionairre.

(Taken from my new obsession and one of the best food blogs I have read : http://www.lottieanddoof.com/ )


Sweet or salty?

Sweet, if i must choose. But what I really adore is the perfect combination of the two. Like a chocolate covered pretzel. Or salted caramel. Oh, heaven.

Chocolate or vanilla?

Decadent, melt in your mouth milk chocolate. Nothing fancy, just pure melty goodness.

Hot or mild?

I wish I loved spicy foods, because mild is just so boring. But I simply do not like to be in pain while I enjoy a tasty meal.

What won’t you eat?

Mushrooms. Any and all kinds. I can't handle even the smell of them. I will not be convinced.

Favorite object in your kitchen?

The wooden panels on either side of the stove that my great-grandmother hand painted with gorgeous peacocks.

What are you scared of in the kitchen?

The dark recesses above the fridge. I don't want to know what lurks back there.

Do you prefer to cook alone or with others?

Alone, for people. Too many cooks in the kitchen really stress me out, and cooking is a great way for me to unwind and get creative. However, if someone were to offer to help me prep things, I'd gladly accept the help. And I do like it when people pop their head into the kitchen so I don't feel lonely. Mostly, I just like to be able to accept all the credit! Ha!

What country would you move to for the food?

Oh, Italy. In a heartbeat.

If you were to come back as a fruit or vegetable, what would you be?

Probably something weird like an olive. (I like Jen's answer, so I'm keeping it!)

What’s for dinner?

Hopefully, pizza. Delivered. I don't have the energy to cook!

Most memorable meal?

This Christmas, Husbear and I hosted an Orphan's Christmas Dinner for those of our friends who found themselves stuck in the City for the Holidays, like us. This was my way to do something to take my mind off the heartache of not being able to be with my family. So I planned an incredible menu of Creamy Parsley and Pistachio Fettucine, Roasted Broccoli, Garlic mashed potatoes, and Panettone Bread Pudding for dessert (everything was beautiful and delicious) and served it to my little New York family. It was our first married Christmas, and I really and truly felt maternal in the most beautiful way. I love to serve those close to my heart.


YOUR TURN!
especially Laura (from Piece of Cake) and Cassie (from How to Eat a Cupcake)!


Also, my very favorite chocolate chip cookie recipe, coming soon, as well as a review for the Best Steakhouse Ever, Morton's (in Brooklyn).
I apologize for the lack of posts recently.
Husbear and I just celebrated our first wedding anniversary this weekend! We've been pretty...uh, busy. ;) But soon, my loves. Soon, you will have treats.

Monday, March 2, 2009

Dairy-Free Blueberry Muffins:

So it seems that Miles, the little guy I take care of each day, is allergic to cow's milk protein. Since he breastfeeds, that means his mama is off dairy.
She is not very thrilled about this recent development.
I'm doing what I can to help make the transition a little easier by showing her that dairy-free treats are often just as good, if not better, than their milky counterparts.
First, I got her hooked on soy chai lattes. MMMMM!!
Second, I baked her these:

Dairy-Free Blueberry Muffins:

Ingredients:
3 cups of all-purpose flour (i used whole wheat, which makes for a thicker set, but if you want fluffy and light, use all-purpose!))
1 Tbsp baking powder
1/2 teaspoon baking soda
1/2 teaspoon salt
5 tbsp unsalted milk-free margarine, softened
5 tbsp natural applesauce
1 cup sugar
2 large eggs
1 1/2 cup soy yogurt (i used strawberry! mmm! i was also a little short, so i made up the difference in soy milk.)
1 tspn lemon or orange zest (i used orange.)
1 1/2 cups blueberries
1 tbsp flour (if using defrosted frozen berries)

Directions:
1. Adjust the oven rack to the middle-lower part of the oven. Preheat oven to 375°F.

2. Whisk together the flour, baking powder, baking soda, and salt and set aside.

3. In a large mixing bowl, cream butter and sugar together, beating until fluffy. Add eggs one at a time, beating until incorporated after each one. Beat in the zest.

4. Mix in 1/3 of dry ingredients. Mix in 1/2 of yogurt. Repeat until all ingredients are just incorporated- Do not over beat! Fold in the berries.
*If you are using frozen berries (like i did), defrost them first, drain the excess liquid, and then coat them in a light dusting of flour.

5. Grease a 12 cup muffin tin. Fill cups about 2/3 full. Bake until muffins are golden brown, about 20 minutes. Test with a toothpick to make sure the center of the muffins are done. Set on wire rack to cool for 5 minutes. Remove muffins from the tin and serve slightly warm.

Camera battery is dead and i don't have the energy to find the charger today, so you will just have to trust that these muffins are delicious and beautiful.

Now baby, mama, and nanny are all happy! Hooray!
Photobucket


In other news, it's a crazy snowy blizzard out there. Blegh.